Knowing how to cut kakariki nails is an excellent skill if you’re a kakariki parrot owner, as this will help maintain their overall health and well-being.
Neglected nails can cause discomfort and injury to your feathered friend. However, trimming your bird’s nails can be challenging, especially if you’ve never done it before.
In this expert guide, we’ll take you through safely trimming your kakariki’s nails. You’ll learn about the importance of nail care, the essential tools required, the preparation process, proper trimming techniques, safety tips, and post-trimming care for kakariki nails.
Key Takeaways
- Trimming your kakariki’s nails is crucial for its health and well-being. Neglected nails can cause discomfort and injury.
- Essential tools for trimming kakariki nails include nail trimmers, styptic powder, and a towel or cloth to restrain the bird.
- Proper technique involves locating the quick and trimming slowly to avoid injury. Safety tips include avoiding excessive force and creating a calm environment.
- Post-trimming care involves monitoring the nails for irritation or infection and promoting healthy nail growth.
- Observation is key to determining the appropriate nail trimming interval for your bird.
Understanding the Importance of Kakariki Nail Care
Kakariki parrots are active and curious birds that rely on their feet for perching, climbing, and exploring. As such, their nails play a crucial role in their overall health and well-being. Neglected nails can cause discomfort, difficulty perching, and even injury to the bird. It is, therefore, important to ensure that your kakariki’s nails are kept in good condition.
Regular nail care is also essential for maintaining your bird’s nail health. Overgrown nails can cause the toes to spread excessively, leading to pain and mobility issues. Additionally, if the nails grow too long, they can become curved and grow into the bird’s foot, making it difficult for the bird to walk or perch.
To ensure your kakariki’s nail health and comfort, it is important to keep their nails trimmed to an appropriate length. This will also reduce the risk of injury from nails that have grown too long. Regular nail care can promote healthy nail growth and help prevent any potential problems with neglected nails.
Tools Needed for Trimming Kakariki Nails
Before attempting to trim your kakariki’s nails, gathering all the necessary tools is important to ensure a safe and successful process.
| Tool | Usage |
|---|---|
| Nail trimmer designed for birds | This specialized tool is necessary to ensure a clean and precise cut without causing unnecessary discomfort to the bird. Choosing a trimmer that fits comfortably in your hand and has sharp blades suitable for the size of your bird’s nails is important. |
| Styptic powder | In case of accidental bleeding, styptic powder can help stop the bleeding quickly. This powder promotes clotting and is easily applied by pressing a small amount onto the bleeding area. Cornstarch can also be used as an alternative. |
| Towel or cloth | Providing a comfortable and secure environment is important when restraining your kakariki for nail trimming. A towel or cloth can gently wrap the bird and prevent excessive movement. |
Keeping these tools in a designated and organized location for easy access before each trimming session is recommended. Properly caring for and maintaining these tools can also ensure longevity and effectiveness.
Preparing Your Kakariki for Nail Trimming
Before trimming your bird’s nails, it is essential to ensure that they are comfortable with being handled and in a calm and stress-free environment. This will help make the process easier and safer for you and your bird.
One way to get your bird accustomed to being handled is to gradually introduce handling and touch, starting with short sessions and gradually increasing the time. Use positive reinforcement, such as treats or gentle praise, to help build trust and make handling a positive experience.
Maintaining the appropriate nail length for your bird’s needs is also important. Long nails can cause discomfort and difficulty perching, while excessively short nails can lead to bleeding or injury. Regularly check your bird’s nails to ensure they are at the proper length, and only trim small amounts at a time to avoid the quick.
If your bird becomes stressed or agitated during the trimming process, take breaks to allow them to calm down before continuing. It is best to have a towel or cloth available to comfortably restrain your bird during trimming to prevent any sudden movements that could result in injury.
Proper Technique for Cutting Kakariki Nails
When trimming your kakariki’s nails, there are several important steps to ensure a safe and stress-free experience for you and your bird. Here’s a step-by-step guide:
- Restrain your bird: Gently wrap your kakariki in a towel or cloth to keep it still during trimming. Be sure not to wrap too tightly and avoid covering the bird’s eyes or beak.
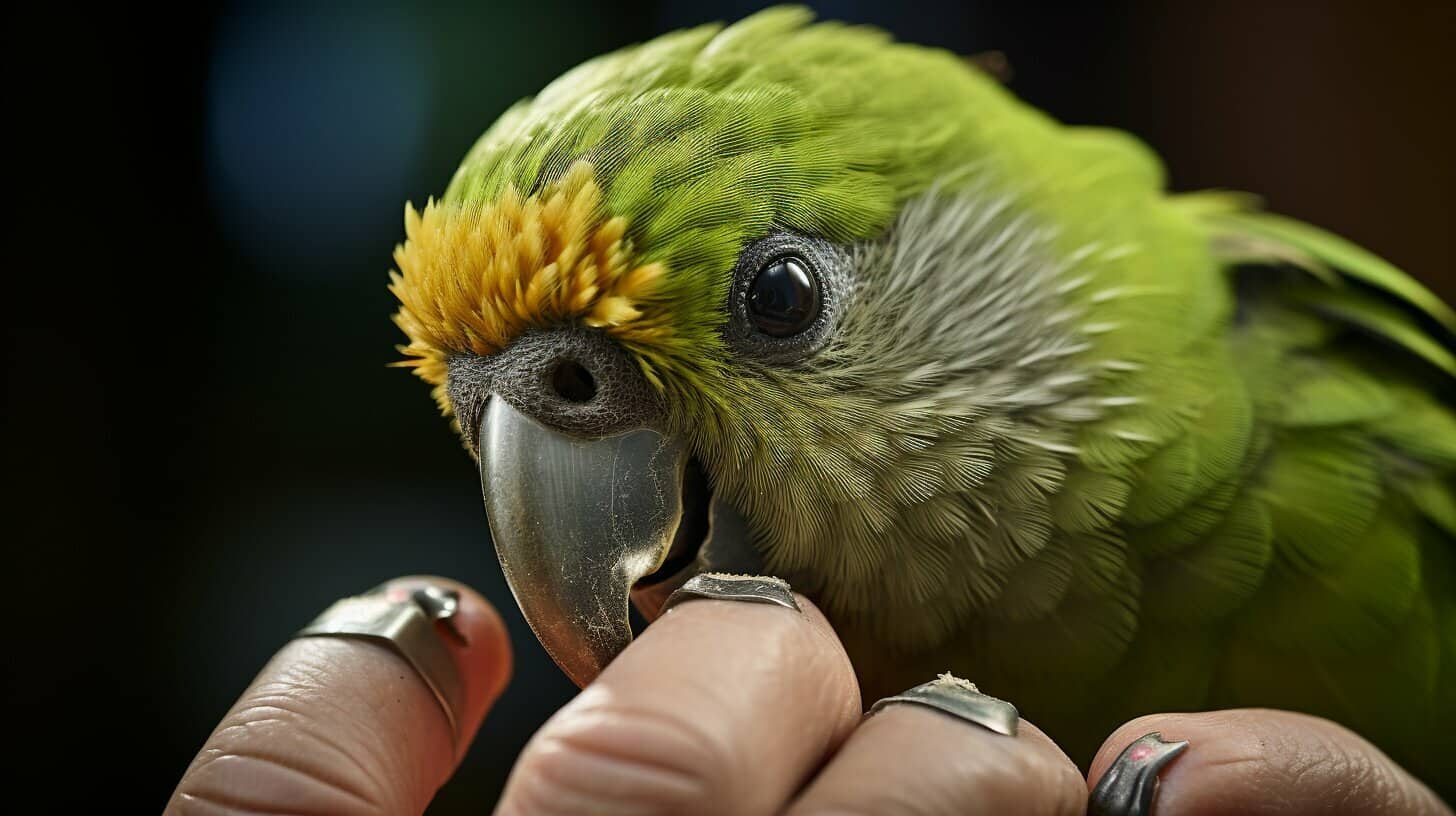
- Locate the quick: The quick is the blood vessel that runs through the nail. It appears as a dark line inside the nail. It is important to avoid cutting into the quick, as it can cause pain and bleeding. Use a good quality nail trimmer designed for birds, and make sure it is sharp and well-maintained.
- Begin trimming: Start by clipping a small amount of the nail tip, avoiding the quick. Increase the amount gradually until you reach the desired length, being cautious not to cut too much at once.
- Check for bleeding: If you accidentally cut into the quick and notice bleeding, use styptic powder or cornstarch to stop the bleeding. Apply gentle pressure to the area until the bleeding stops.
- Take breaks: If your bird becomes agitated or stressed during trimming, take a break and try again later. Trimming your bird’s nails may take several sessions to complete.
Remember to approach the process with gentleness and patience. With proper technique and care, you can help maintain your kakariki’s nail health and overall well-being.
Safety Tips for Nail Trimming
Trimming your kakariki’s nails can be intimidating, especially if you are new to the task. However, you can follow several safety tips to ensure a successful and safe nail-trimming experience for you and your bird.
Use Proper Lighting
Make sure you are trimming your kakariki’s nails in a well-lit area. Good lighting will help you see where the nail’s quick is, reducing the risk of accidentally cutting it.
Don’t Use Excessive Force
Never force your bird’s foot or nail into position. This can cause discomfort and potentially harm your bird. Instead, please wait for your kakariki to position their foot comfortably, or gently guide them into position.
Maintain a Calm Environment
Before trimming your bird’s nails, ensure they are calm and relaxed. Avoid trimming when your bird is agitated or stressed, as this can increase the risk of injury.
Take Breaks
Take a break if your bird becomes stressed or agitated during trimming. Resume the trimming process at a later time when your bird is in a calmer state.
Don’t Panic if There’s Bleeding
In the event of accidental cutting into the quick, don’t panic. Minor bleeding is usually not a cause for concern. Apply styptic powder or cornstarch to the affected area to stop the bleeding. If the bleeding persists, seek veterinary advice.
By following these safety tips, you can ensure a safe and successful nail-trimming experience for you and your kakariki.
Safety Tips for Nail Trimming
Safety should always be a top priority when trimming your kakariki’s nails. Here are some essential tips to keep in mind:
- Use proper lighting: Ensure you have adequate lighting to see the quick, but avoid direct sunlight, which can cause glare and make it harder to see the nail structure.
- Have the right tools: Ensure you have the necessary tools, including a good quality nail trimmer designed for birds, styptic powder, and a towel or cloth to restrain your bird comfortably.
- Maintain a calm environment: Trimming your bird’s nails can be stressful, so creating a calm and relaxed environment is important. Avoid sudden movements or loud noises that may startle your bird.
- Take breaks: If your bird becomes stressed or agitated during trimming, take a break and try again later. It’s important to avoid excessive force when trimming your bird’s nails.
- Be gentle: Always handle your birds carefully and gently trim their nails. Apply steady, firm pressure and avoid squeezing too tightly.
- Don’t cut too much: Avoid cutting too much of the nail at once, as this can increase the risk of cutting into the quick. Trim small amounts of the nail at a time to avoid causing discomfort or bleeding.
- Seek professional help: If you’re inexperienced or uncomfortable trimming your bird’s nails, seek professional help from a trained avian veterinarian or experienced bird groomer. This can ensure that the process is done safely and correctly.
By following these safety tips, you can ensure a stress-free and safe nail-trimming experience for you and your kakariki.
Post-Trimming Care for Kakariki Nails
After trimming your kakariki’s nails, you can do a few things to ensure that they remain healthy and strong. Monitoring the nails for any signs of injury or irritation is essential, as is taking steps to promote healthy nail growth. Here are some post-trimming care tips for kakariki nails:
1. Watch for signs of redness or swelling.
After trimming your bird’s nails, watch for any signs of redness or swelling around the nail bed. If you notice any of these symptoms, it could indicate that the nail was cut too short or that your bird has developed an infection. Contact your avian veterinarian for advice on how to proceed.
2. Avoid rough surfaces.
During the first few days after trimming your kakariki’s nails, avoid placing your bird on rough or abrasive surfaces. This will help prevent any discomfort or pain caused by sensitive or tender nails.
3. Promote healthy nail growth.
Keeping your kakariki’s nails healthy and strong between trims is essential for overall nail health. To promote healthy nail growth, make sure your bird’s diet contains plenty of essential vitamins and minerals, such as calcium and vitamin D. Providing your bird with a variety of perches with varying textures and diameters can also help keep the nails in good condition.
4. Establish a regular trimming schedule.
Regular nail trimming is essential to maintaining your kakariki’s overall health and well-being. Depending on your bird’s needs, you may need to trim their nails every few weeks or months. Work with your avian veterinarian or a professional bird groomer to establish a regular trimming schedule that works well for you and your bird.
Signs of Overgrown Nails in Kakariki Parrots
It is essential to maintain a healthy nail length for your kakariki parrot. Overgrown nails can lead to various problems that affect the bird’s overall health and well-being. Here are some signs to look for when checking your bird’s nails:
- Difficulty gripping or perching
- Inability to walk or climb effectively
- Nails curling or growing in abnormal directions
If you notice any of these signs, it is essential to trim your bird’s nails immediately. Neglected nails can lead to discomfort and even injury, affecting your bird’s quality of life. Regular nail checks and trimming can help prevent issues associated with excessively long nails.
Professional Nail Trimming for Kakariki Parrots
If you are unsure about trimming your kakariki parrot’s nails, seeking professional help is always an option. An avian veterinarian or an experienced bird groomer can help ensure your bird’s nails are trimmed safely and correctly.
Professional nail trimming is especially recommended if you are uncomfortable or inexperienced. A professional will have the necessary skills and tools to safely trim your bird’s nails without causing injury or stress.
In addition, a professional can also guide other aspects of kakariki nail care, such as maintaining the appropriate nail length and post-trimming care.
What to Expect During a Professional Nail Trimming Session
During a professional nail trimming session, the groomer or veterinarian gently restrains your bird to keep them calm and ensure their safety. They will then use a nail trimmer designed for birds to trim the nails to the appropriate length carefully.
Professional nail trimming sessions typically take a few minutes, and your bird will likely not experience discomfort. You may want to bring along your bird’s favourite treat or toy to help keep them distracted and comfortable during the session.
After the trimming is complete, the groomer or veterinarian may guide you on maintaining the appropriate nail length between trims and promoting healthy nail growth.
Cost of Professional Nail Trimming
The cost of professional nail trimming for kakariki parrots can vary depending on your location and the specific provider you choose. However, prices typically range from £10-£20.
While professional nail trimming may seem like an added expense, it is a worthwhile investment in your bird’s health and well-being. Neglected nails can lead to discomfort, difficulty perching, and injury, so regular trimming is essential.
Nail Trimming Frequency for Kakariki Parrots
Regular nail trimming is essential to kakariki nail care, as overgrown nails can cause discomfort and difficulty perching. However, trimming frequency may vary depending on the individual bird’s nail growth rate and lifestyle.
Trimming their nails every 4-6 weeks is a good rule of thumb for most kakariki parrots. If your bird spends much time outside their cage, such as on perches or playing on branches, it may naturally wear down their nails quickly. In contrast, birds that spend most of their time in their cage may require more frequent trimming to prevent overgrown nails.
It’s essential to observe your kakariki’s nail growth and behaviour regularly. Signs of overgrown nails include difficulty gripping perches or walking on flat surfaces, which may lead to injuries. If you notice any of these symptoms, it’s time to trim your bird’s nails again.
How to Check for Overgrown Nails
To check for overgrown nails, gently hold each of your bird’s toes and inspect the nails’ length. The nails should be just above the toe pad, or slightly shorter, depending on your bird’s needs. If the nails extend beyond the toe pad, it’s time for a trim.
Regular nail trimming is a simple but crucial aspect of kakariki nail maintenance. By observing your bird’s nail growth and behaviour and trimming their nails at appropriate intervals, you can ensure your kakariki’s overall health and well-being.
Conclusion
Regular nail trimming is vital to caring for your kakariki parrot’s health and well-being. Neglected nails can lead to discomfort, difficulty perching, and injury. Understanding and appreciating the significance of kakariki nail care is essential to ensure your bird maintains optimal nail health.
Equally important is having the right tools when trimming your bird’s nails. You will need a good quality nail trimmer, styptic powder, and a towel or cloth to help you restrain your bird safely. Preparing your kakariki for nail trimming requires a calm and stress-free environment. You can achieve this by gently handling your bird and acclimating them to being touched.
Cutting your kakariki’s nails should be done gently and carefully. A step-by-step process will help you to know where to look for the quick, the blood vessel inside the nail. Trimming too much at once can be painful and cause bleeding. Therefore, take care to trim only a small amount at a time. Finally, monitoring your bird’s nails post-trimming for any signs of irritation or infection is essential.
If you’re uncomfortable trimming your kakariki’s nails, you can seek professional help from a trained avian veterinarian or an experienced bird groomer. They’ll have the necessary knowledge and experience to help your bird maintain optimal nail health.
In conclusion, maintaining the right nail length for your kakariki parrot is essential to their overall health and well-being. By being aware of the importance of kakariki nail care, following proper techniques and safety tips, and seeking professional help when necessary, you can help your bird maintain healthy nails.
How to Hold and Clip a Kakarikis Nails
Do you need something more visual to help you understand how to cut Kakariki nails? Then check out this helpful video from Love of Pets.
FAQ
Q: Why is kakariki nail care important?
A: Neglected nails can cause discomfort, difficulty perching, and potential injury for kakariki parrots.
Q: What tools do I need for trimming kakariki nails?
A: Essential tools include a bird nail trimmer, styptic powder for bleeding, and a towel or cloth for restraint.
Q: How do I prepare my kakariki for nail trimming?
A: Get your bird accustomed to being handled and create a calm environment for stress-free grooming.
Q: What is the proper technique for cutting kakariki nails?
A: Trim the nails gently, locate the quick (blood vessel), and trim a small amount at a time to avoid cutting into the quick.
Q: What are some safety tips for nail trimming?
A: Avoid excessive force, use proper lighting, and seek professional help.
Q: How do I deal with bleeding nails?
A: Apply styptic powder or cornstarch to stop the bleeding. Minor bleeding is usually not a cause for concern.
Q: How should I care for kakariki nails after trimming?
A: Monitor for any signs of irritation or infection, maintain appropriate nail length between trims, and promote healthy nail growth.
Q: What are the signs of overgrown nails in kakariki parrots?
A: Difficulty gripping or walking may indicate overgrown nails, emphasizing the need for regular checks and trims.
Q: Can I seek professional nail trimming for my kakariki parrot?
A: Yes, a trained avian veterinarian or experienced bird groomer can assist with nail trimming if desired.
Q: How often should kakariki parrot nails be trimmed?
A: Nail trimming frequency varies, but regular observation is key to determining the appropriate interval for each bird.

Have comments or questions about this article? Then get involved!
Spotted an error or something we have missed? Let us know